How to make an easy chocolate drip cake with step by step pictures
Here's a very easy and fool-proof way to make a beautiful and professional-looking drip cake, perfect for a birthday or other celebration. You won't need any fancy ingredients or special equipment.
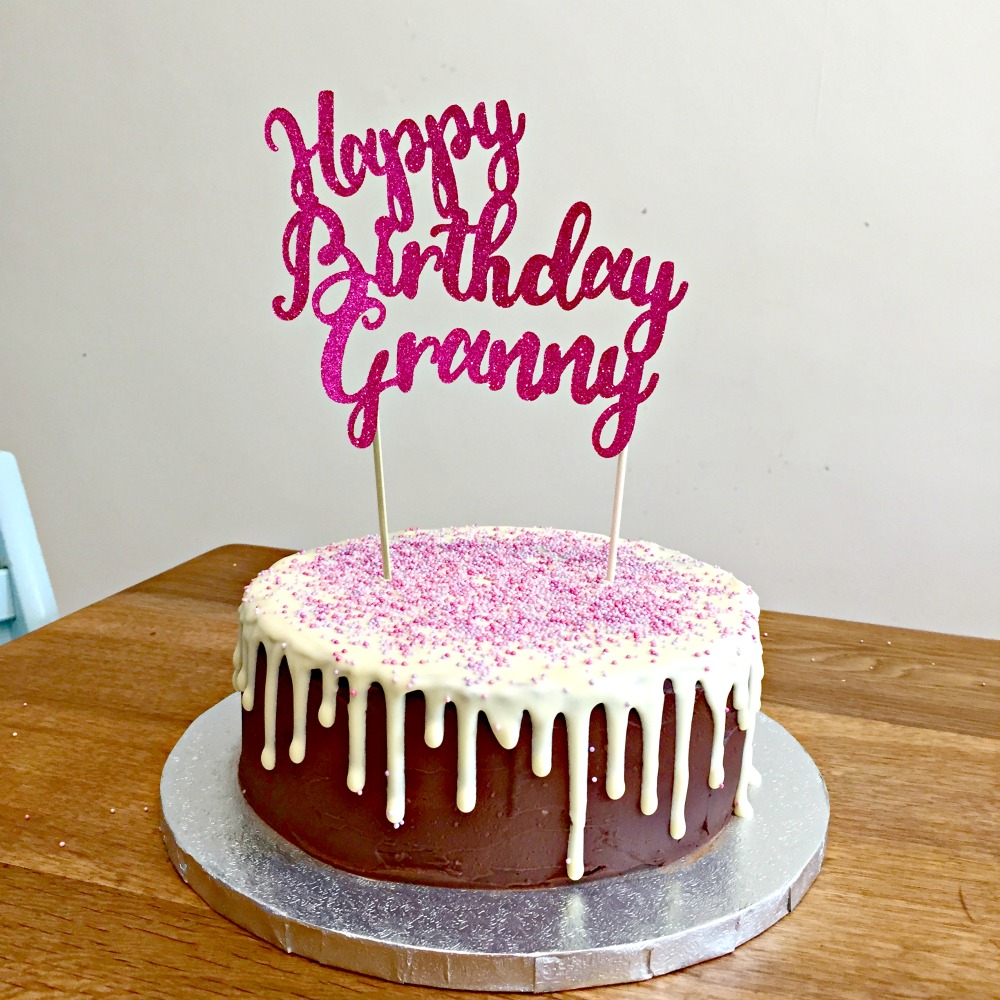

This cake is simply made by sandwiching and covering two chocolate cakes with ganache before using melted white chocolate to create the drip effect. I finished off my drip cake with some colourful sprinkles and a bespoke glittery cake topper from Dindindies.


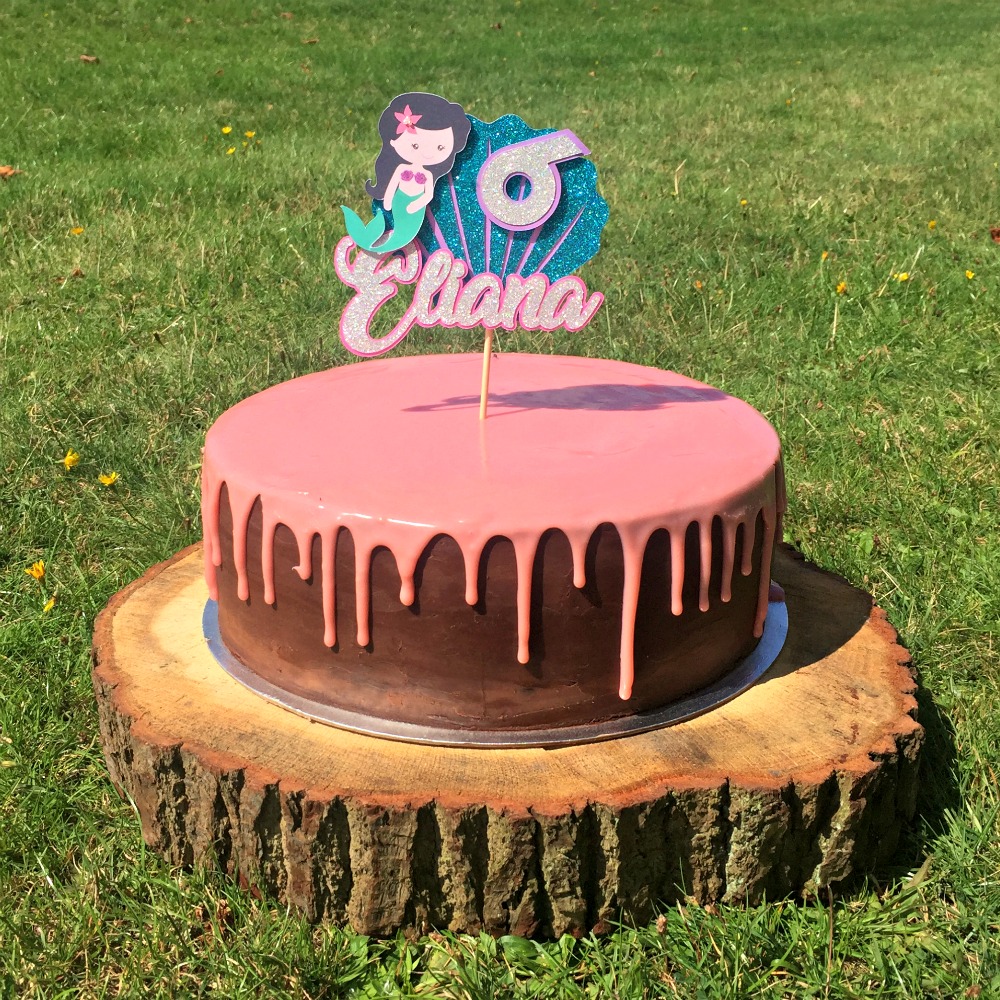
It's also very easy to make this colourful drip cake using white ganache mixed with some food dye instead of melted chocolate. (Personalised mermaid topper also from Dindindies). Scroll right down to the bottom of this post to see my notes on how to do that.
How to make this easy drip cake with step by step photos


Step 1: Bake cakes, level and sandwich together
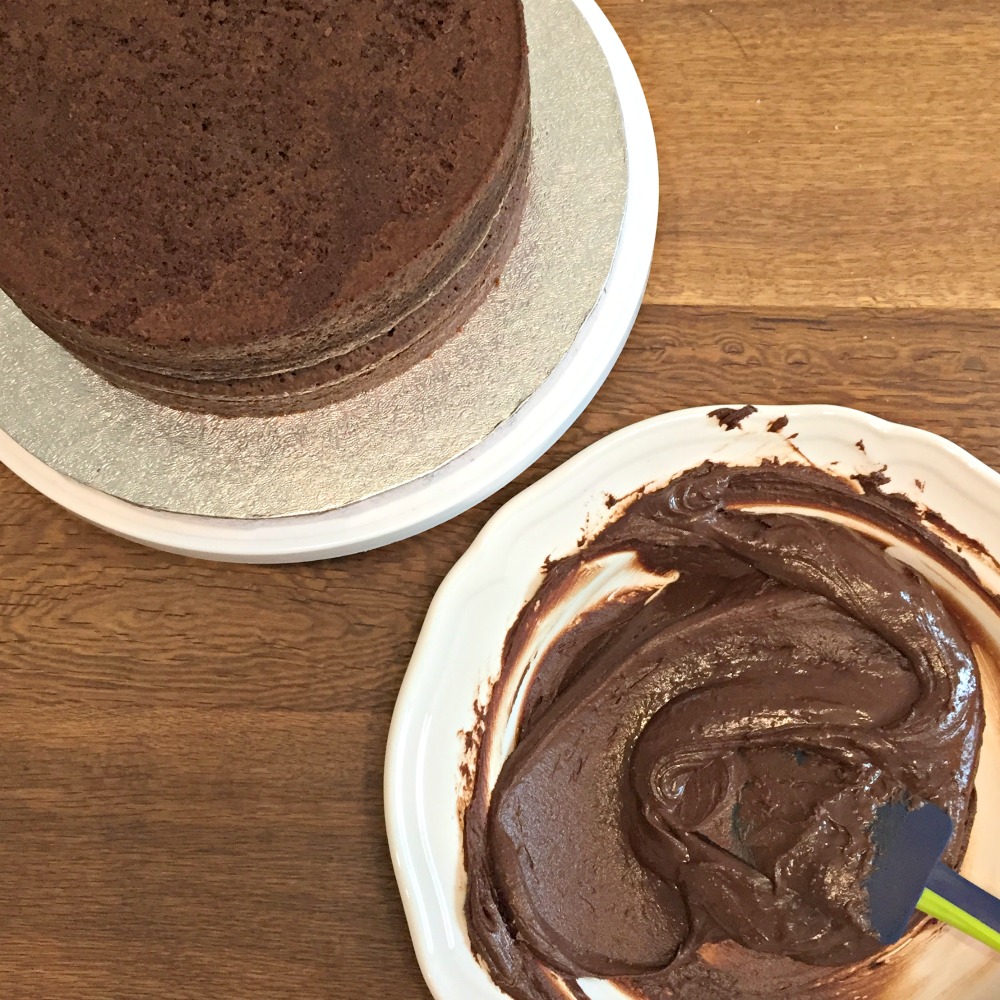
For this particular cake in the photos I baked two 20cm chocolate brownie cakes. When cool I levelled them off a little with a serrated knife before sandwiching together with some chocolate ganache (for recipe see step 2).
Notice the bottom cake is the right way up and the top cake is upside down on top of it. The inverted cake will give the drip cake a nice flat top and a sharp edge. I use a cake turntable, which was a fiver from eBay - it's not absolutely necessary to use one but I find them very helpful.


Step 2: Crumb coat the cake with chocolate ganache frosting
To make the chocolate ganache put 200g of dark chocolate and 200ml of double cream in a pan and stir over a low heat until the chocolate is completely melted and both are combined. This makes enough ganache to sandwich and coat a cake this size. (I don't add any sugar to my ganache as I find the brownie cake is sweet enough, but you could add some caster sugar to the ganache to taste if you wish). When the ganache is cool, but still soft, it's ready to use.

I first use a spatular to fill in the gap where the cakes are sandwiched together, before spreading the sides with a thin, even coat of ganache to seat in the crumbs. A pallet knife is best for this job and the turntable helps to get a smooth coat. I then spread a thin layer of ganache over the top and use the pallet knife to smooth it out. Afterwards I use the pallet knife to tidy up the edge of the cake. It doesn't have to be perfect as another layer of ganache will be going over it. The cake then goes in the fridge to chill for about half an hour.


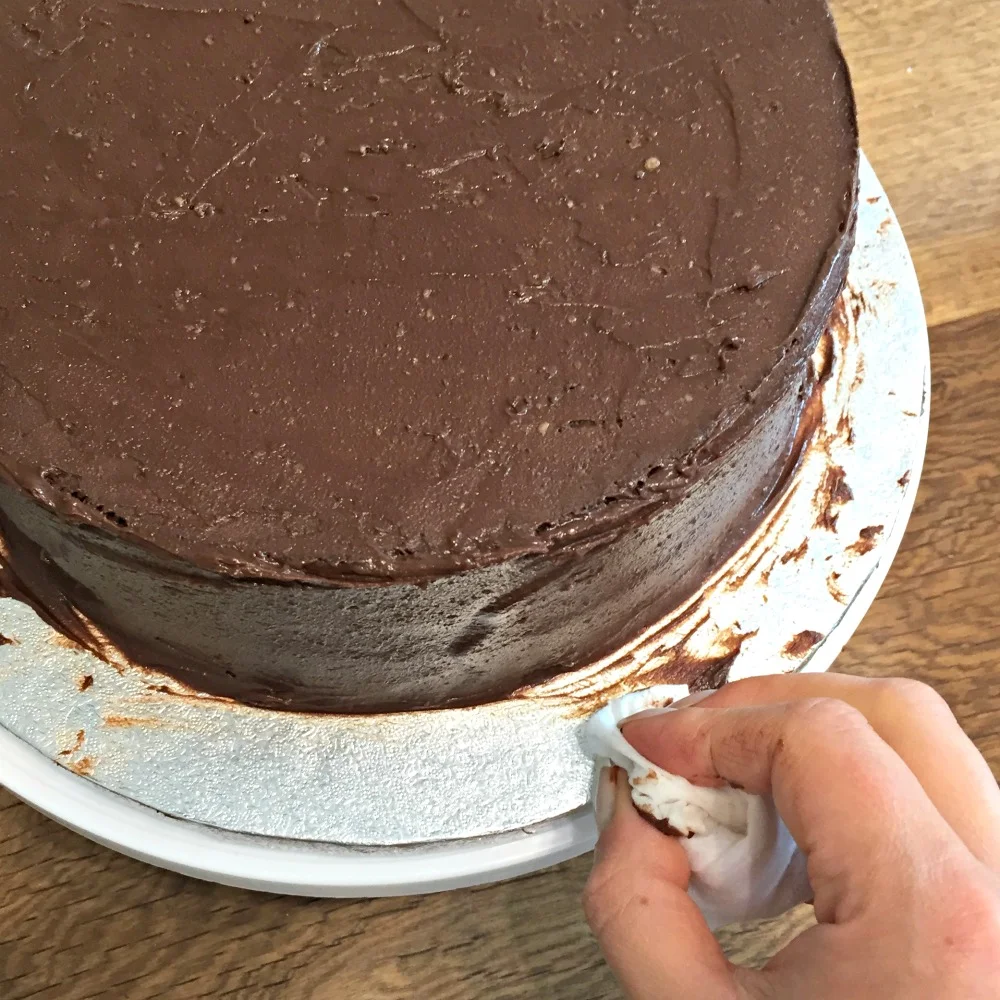
Step 3: Coat cake with top layer of ganache frosting
Coat the cake with another layer of the ganache frosting. The sides need to be neat as they will show, the top just needs to be flat as it will be covered with drip icing later on. I have a little plastic smoother to make the sides nice and neat - another eBay purchase for no more than a pound. For super-smooth sides I slap on a layer of the ganache before smoothing it round the sides with the tool at the same time as turning the cake on the turntable.


I coat the sides first, pushing any excess ganache onto the top of the cake as I go, and then I coat the top. Some people prefer to do it the other way around, just do whatever you find easiest. Once the cake has the second coat on I clean up the board and then smooth round the top edge with my finger if there's any bumps. Then the cake goes back in the fridge for 30 minutes before applying the drip icing.

Step 4: Apply the drip icing
200g of white chocolate is more than enough to create the drip effect on this cake and cover the top as well. Break it into squares and put it inside a disposable piping bag and clip the end (a food bag works if you don't have a piping bag). Place the bag in a bowl of recently boiled water to melt it. When it's completely melted, place it onto a clean tea towel to dry it off and leave it to cool.
Wait until the chocolate feels cool, but still very liquid, before you use it. If it's too warm it will run right off the cake. A good test is to first pipe some onto a tilted plate to see how fast it comes out before you pipe it onto your cake.


Creating the drip effect on a drip cake is easy but it can take a little practice. Hold the piping bag over the edge of the cake and squeeze out some of the chocolate. It should just hit the top of the cake before spilling over the edge down the side. See how far it runs down before moving onto the next drip. Try to alternate long drips and short drips, which gives the best effect.

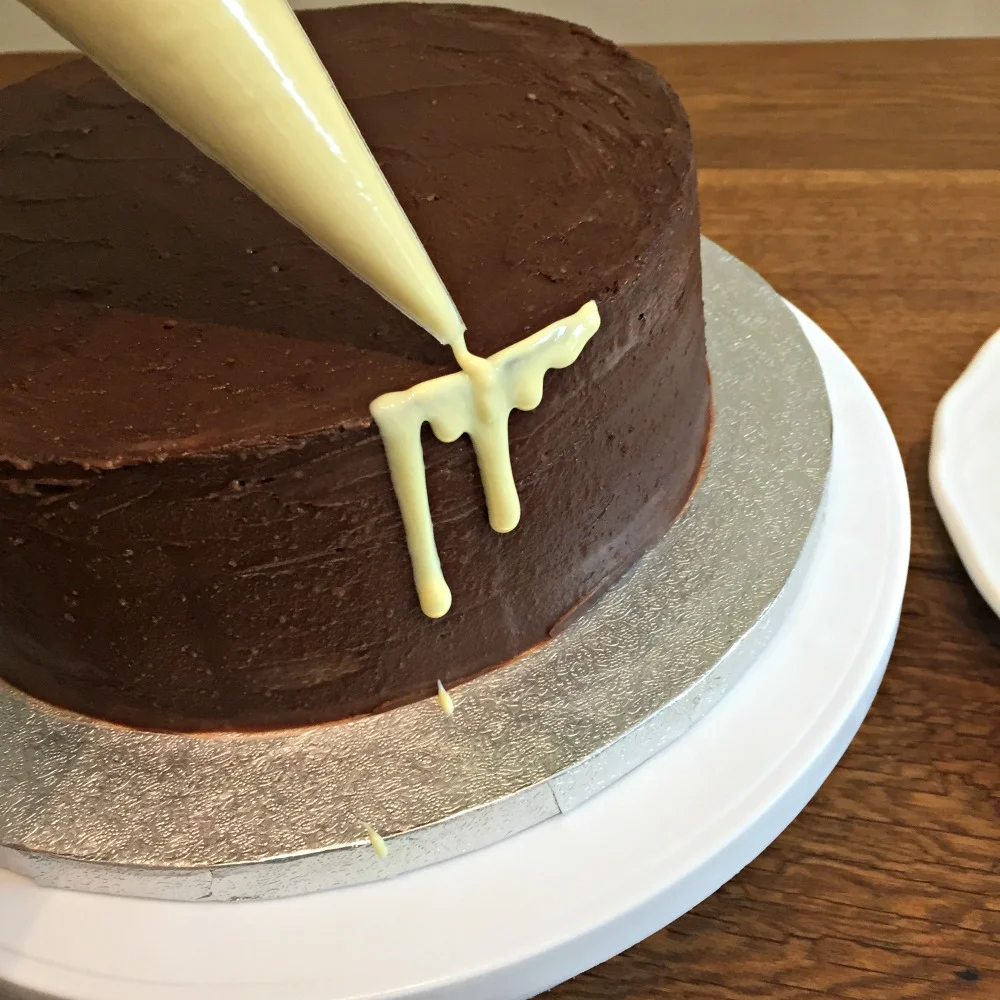
Keep going round and round the side of the cake (this is where the cake turntable is handy) until the cake has drips all the way around. The quicker you can do this the better as the chocolate may start to cool. Don't worry if it doesn't look as perfect as you hoped the first time, it takes a bit of practice (and it will taste great anyway). When you have finished the drip effect, pipe white chocolate on the top of the cake, in a spiral, from the outside to the centre.

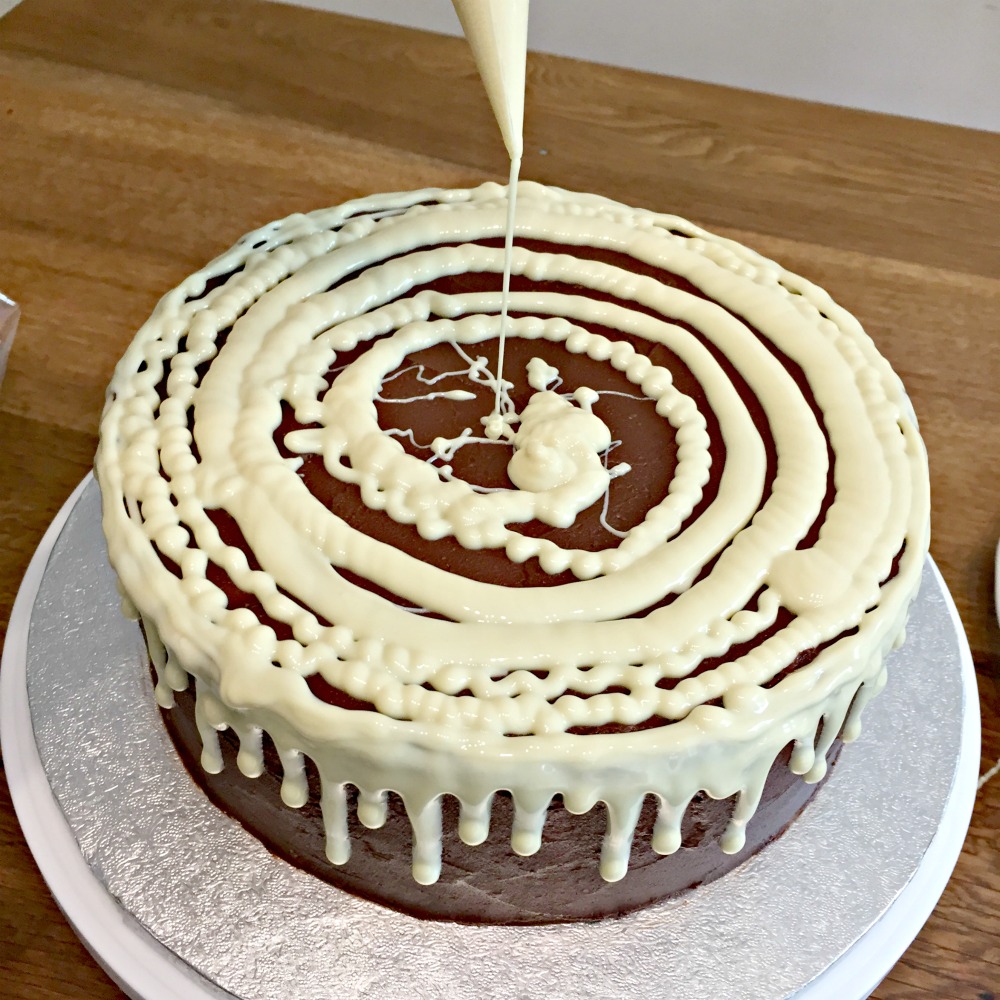
Use a palette knife to spread the melted chocolate evenly over the top of the cake. If the white chocolate is beginning to cool then you might get a bit of a bumpy top surface - like mine is in the photos! Don't worry too much, it will taste great, and you can always hide it with sprinkles!


Step 5: Finishing touches
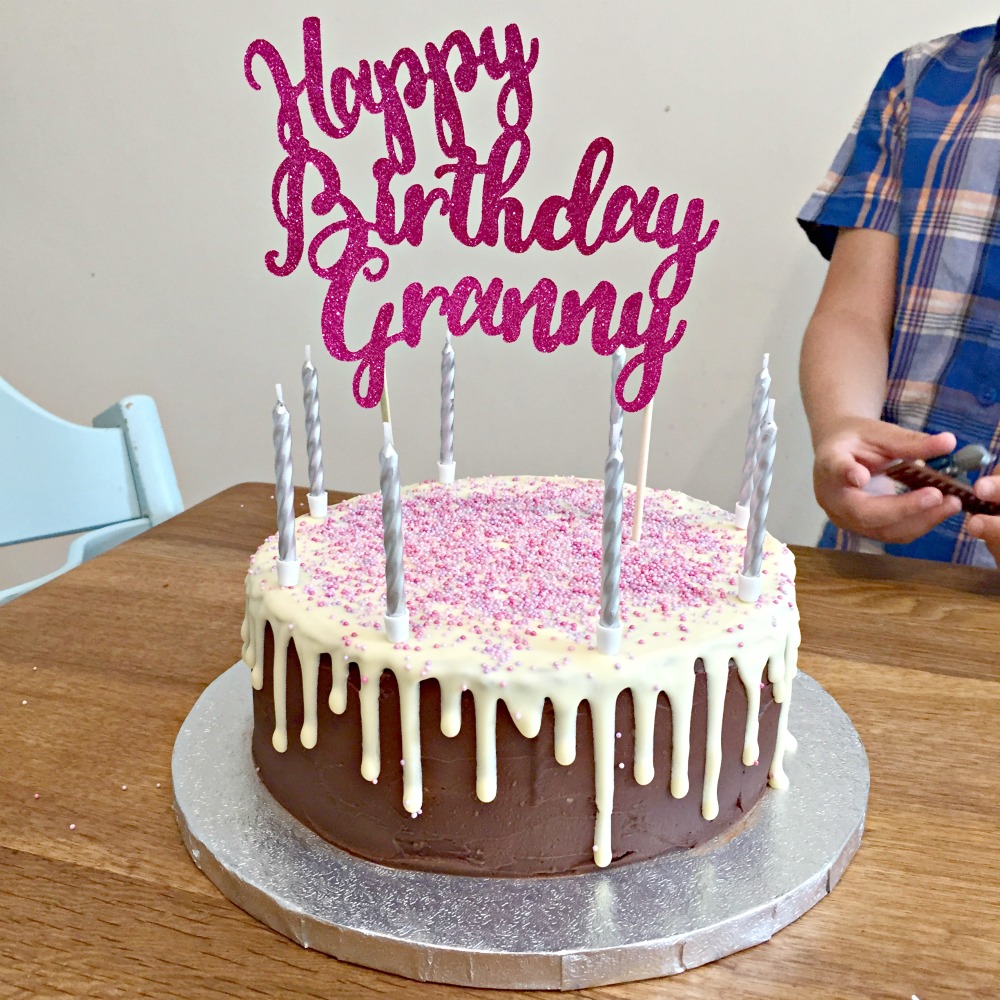
I finished off this drip cake with some sparkly pink sprinkles to make it look pretty - they also helped to hide the fact that the chocolate wasn't completely smooth on the top! If you're going to use sprinkles on your drip cake do it quickly before the chocolate dries or they won't stick.

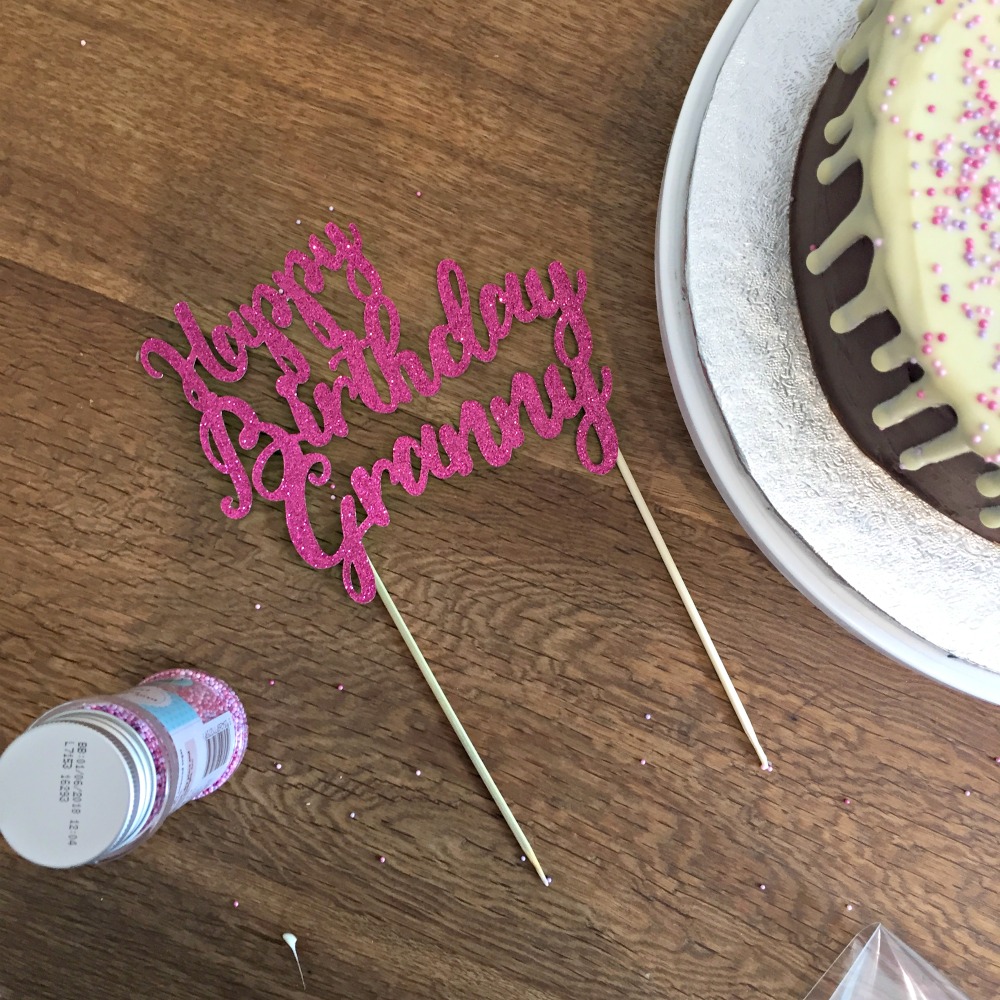
The pink sprinkles also went really well with my bespoke pink glittery cake topper which I ordered from Dindindies. A few silver birthday candles to match the silver board and the cake was ready.

How to use chocolate ganache for the drip effect icing of a drip cake
To make coloured ganache to use for drip icing I make up white chocolate ganache using 2 parts white chocolate to 1 part double cream. White chocolate is much softer at room temperature so you need more chocolate than cream to make white chocolate ganache. Melt the cream and chocolate together over a low heat stirring all the time. When combined add gel food colour to achieve the desired shade. When the ganache is cool but still runny it's ready to use. To create the drip effect you can pipe it onto the cake, as above. Alternatively use a spoon to carefully drip the coloured ganache onto the cake from a bowl, as I have done in the photos below.